Air Quality Monitoring and Automation

During COVID I did a lot of working from home, and, lucky for me, I had a study to work from. However, I used to hit a bit of wall in the afternoon, feeling tired and drowsy, and I initially put this down to the small room getting particularly warm with the north-facing window and closed door. But, as it turned out, it wasn't just the high temperature - it was high CO2 levels.
Ambient CO2 levels are a common measure of "air quality" as they can have impacts on your health. It is generally advised that indoor CO2 levels remain below 1,000 ppm (parts per million), and levels above can lead to drowsiness, headaches and poor concentration.
Now one might say "Why don't you just open a window or door?". But that would be too easy! Instead, let's start monitoring CO2 and implement some automations to reduce the levels for us.
What you'll need
- ESPHome device
-Compatible CO2 sensor
-ESPHome dashboard
-Home Assistant
-Climate system with Fan only function
Monitoring CO2 Levels - ESPHome & Home Assistant
I'm a big fan of ESPHome devices, particularly those made by M5Stack. They're a great middle ground on price, quality and flexibility - perfect for someone who doesn't own a soldering iron.
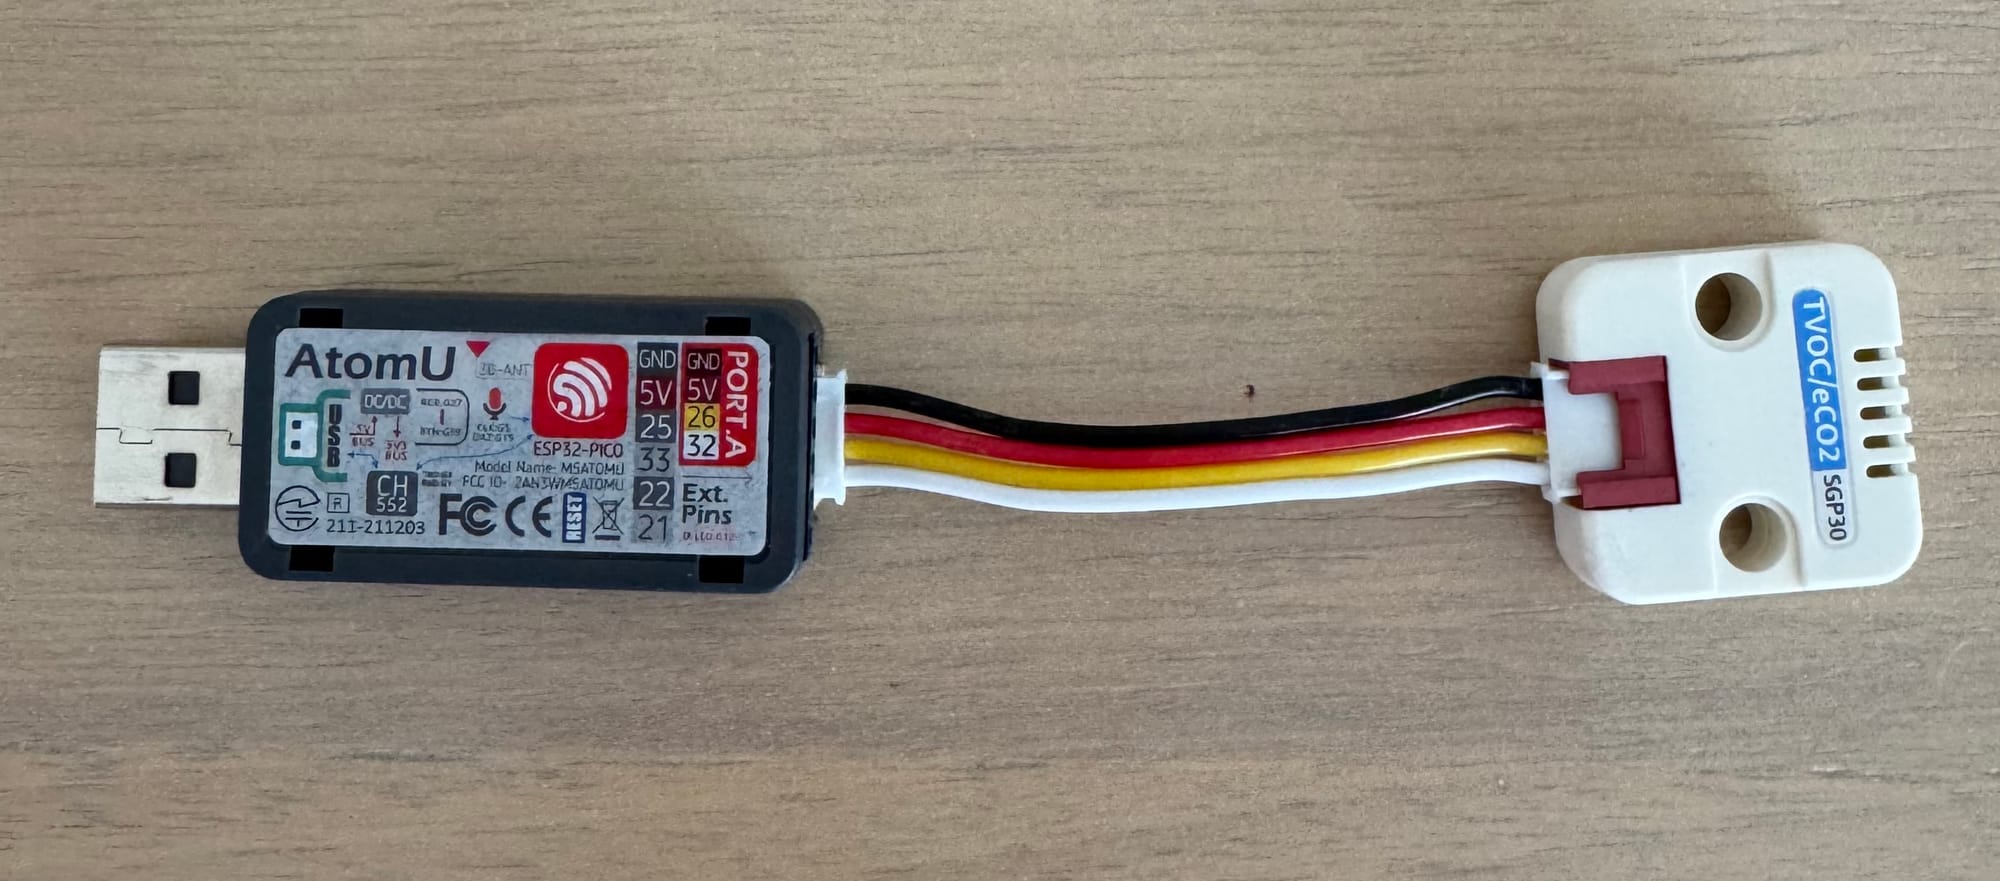
I've got a bunch of AtomU ESP32's around so that's what I'll be using below, but since this is an old model, I'd recommend using the AtomS3U ESP32S3 which has the same HY2.0-4P port. We'll pair this with the TVOC/eCO2 Gas Sensor Unit (SGP30) to measure both CO2 and TVOC (total volatile organic compounds). We don't really need TVOC but it is another common measure used for air quality, so we'll take it.
First, navigate to https://web.esphome.io (on a compatible browser) and perform the initial install of ESPHome on the device and connect to your Wi-Fi network. Then add it to your ESPHome dashboard (it should be discovered automatically). Once adopted, add the following to your configuration:
i2c:
  sda: GPIO26
  scl: GPIO32
  scan: true

sensor:
  - platform: sgp30
    eco2:
      name: "eCO2"
      id: study_co2
      accuracy_decimals: 1
    tvoc:
      name: "TVOC"
      id: study_tvoc
      accuracy_decimals: 1
    store_baseline: yes
    address: 0x58
update_interval: 1sInstall the updated configuration and wait 12 hours for the sensor to create a baseline. It is recommended that the sensor is exposed to outside air for at least 10 minutes during this process.
Now, if you havent already, add the ESPHome device to Home Assistant (this should be automatically discovered). Once done, you should see the sensor readings.
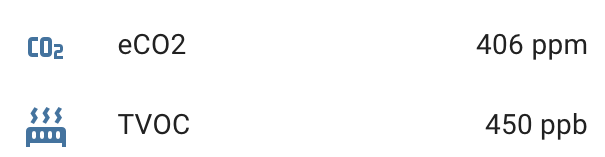
This is great, but how do we know what is a good level and a bad level?
That's where ChatGPT comes in.
Interpreting CO2 and TVOC Levels - ChatGPT & Home Assistant
If we want to implement automations based on the measurements, we need to figure out what is considered "bad air quality" and what is "good air quality". Let's see what ChatGPT suggests.
Using CO2 in ppm and TVOC in ppb as inputs, create a table providing an air quality rating system and the corresponding CO2 and TVOC levels for each
And here is the output (results may vary):
| Air Quality Rating | CO₂ (ppm) | TVOC (ppb) | Description |
|---|---|---|---|
| Excellent | 350 - 450 | 0 - 50 | Fresh air, ideal for indoor environments. Little to no pollutants present. |
| Good | 450 - 700 | 50 - 200 | Good air quality with minimal pollutants; ideal for most people indoors. |
| Moderate | 700 - 1000 | 200 - 500 | Some air quality concerns; sensitive individuals may experience slight discomfort. |
| Poor | 1000 - 2000 | 500 - 1000 | Stale indoor air; may cause discomfort like headaches or fatigue in sensitive groups. |
| Unhealthy | >2000 | >1000 | Unhealthy air quality; likely to cause discomfort and health issues, especially with prolonged exposure. |
Looks about right based on some quick research, and certainly a good starting point. From here we could create our automations using the specified thresholds, but there is a better way: using a Template sensor.
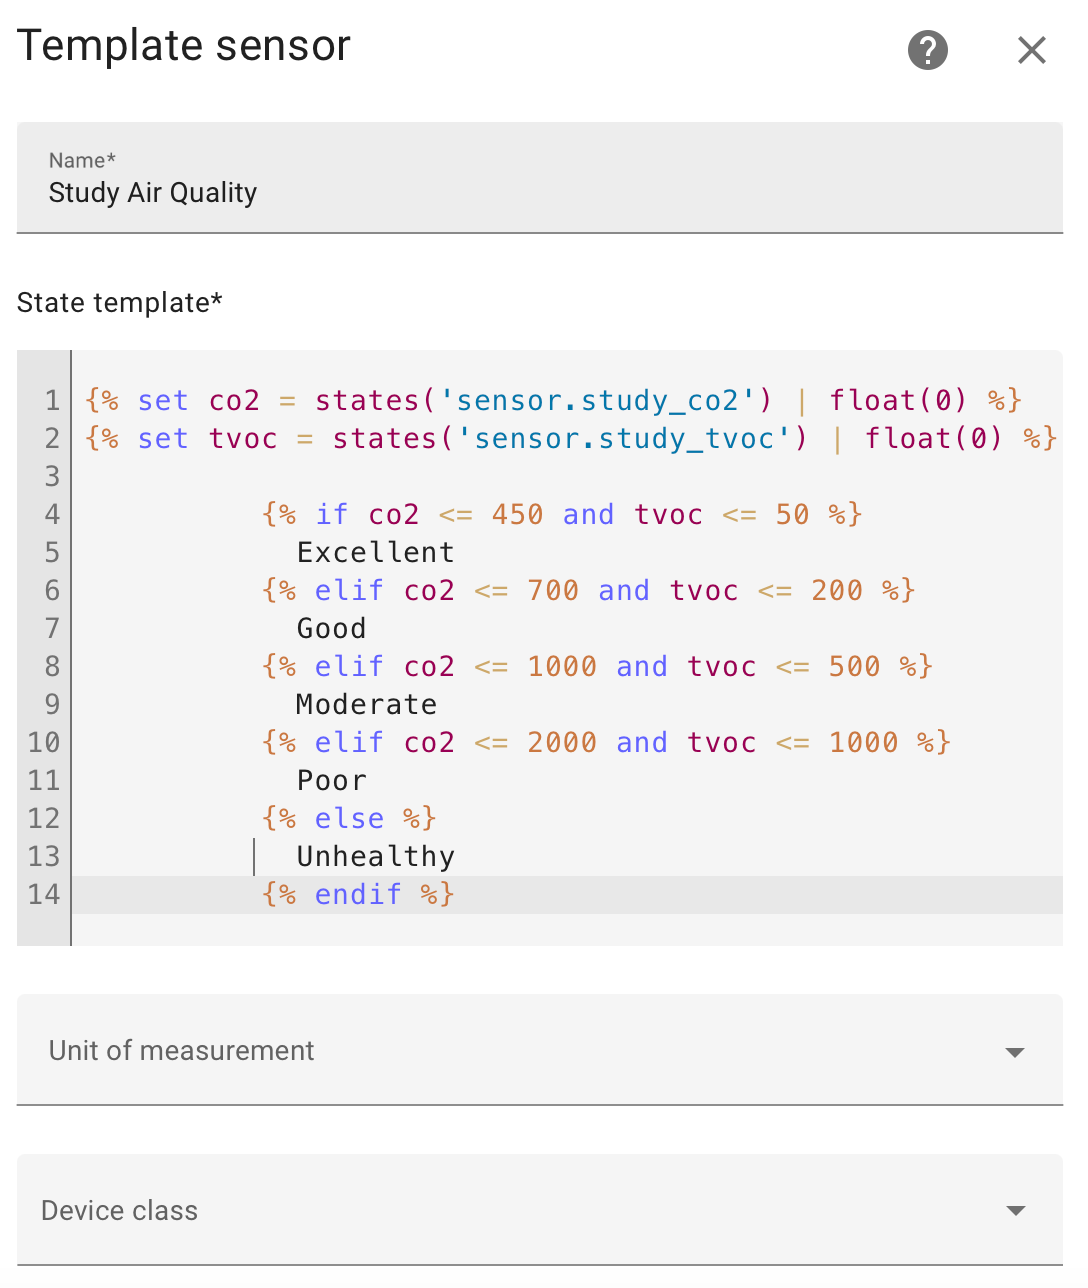
In Home Assistant, navigate to Settings > Devices & services > Helpers and click Create Helper. Scroll down to select Template and then Template a sensor.
From here we want to populate the following details:
Name: <what you want to call the sensor, eg Study Air Quality>
Template:
{% set co2 = states('sensor.study_co2') | float(0) %}
{% set tvoc = states('sensor.study_tvoc') | float(0) %}

          {% if co2 <= 450 and tvoc <= 50 %}
            Excellent
          {% elif co2 <= 700 and tvoc <= 200 %}
            Good
          {% elif co2 <= 1000 and tvoc <= 500 %}
            Moderate
          {% elif co2 <= 2000 and tvoc <= 1000 %}
            Poor
          {% else %}
            Unhealthy
          {% endif %}
Even with this formatting it still works
Unit of measurement: <blank>
Device class: <blank>
State class: <blank>
Device: <your ESPHome device>
Then click Submit.
Next, navigate to the ESPHome device and you'll see the new sensor is visible and updating.
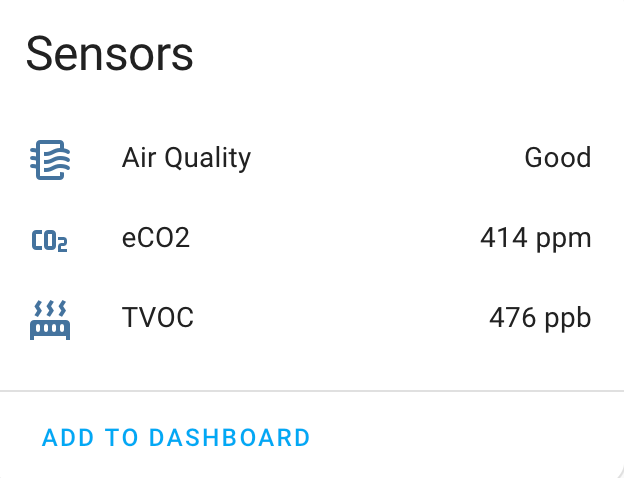
Nice.
Now we're ready to automate.
Automating Climate Fan only - Home Assistant
Now to fix our air quality problem in the only way I know how.
Climate: Fan Only Poor Air Quality
Triggers
We'll want to trigger this automation when the air quality in the study becomes poor or unhealthy for at least 5 minutes, to allow for temporary variations in the room.
triggers:
  - trigger: state
    entity_id:
      - sensor.study_air_quality
    to: Poor
    for:
      hours: 0
      minutes: 5
      seconds: 0
  - trigger: state
    entity_id:
      - sensor.study_air_quality
    to: Unhealthy
    for:
      hours: 0
      minutes: 5
      seconds: 0
OPTIONAL: As a bonus, we also want to trigger this automation if the room becomes occupied for 15 minutes. More on this under conditions.
triggers:
  - trigger: state
    entity_id:
      - binary_sensor.study_occupancy
    to: "on"
    for:
      hours: 0
      minutes: 15
      seconds: 0
Conditions
As covered in the optional trigger above, we want to check whether the room is occupied as we don't need improve air quality in the room if no-one is in there. You may not have an occupancy sensor in your room, so instead you can consider whether anyone is home or if there has been motion in the room within the last x minutes.
conditions:
  - condition: state
    entity_id: binary_sensor.study_occupancy
    state: "on"
Next we want to check if the climate system is a) currently off, and b) if the zone for the room is turned on. If the climate system is already on, then air should already be circulating and we don't want to override the existing mode (e.g. Cool). If the climate zone for the room is off, we also don't want to turn the climate system on when it won't circulate air in the room. This may not be valid for your particular setup, and may even want to turn on the zone in the actions.
conditions:
  - condition: device
    type: is_off
    device_id: 372e8ca97ff3b05279392bba8f4a2cce
    entity_id: 54e58335d52e4e856790c87870f1f6e1
    domain: switch
  - condition: device
    type: is_on
    device_id: 372e8ca97ff3b05279392bba8f4a2cce
    entity_id: 54e58335d52e4e856790c87870f1f6e1
    domain: switch
Finally, since we have an occupancy trigger, we want to again consider the current air quality. If you don't have the occupancy trigger, you can skip this one.
conditions:
  - condition: or
    conditions:
      - condition: state
        entity_id: sensor.study_air_quality
        state: Poor
      - condition: state
        entity_id: sensor.study_air_quality
        state: Unhealthy
Actions
Finally, we want to turn on the climate system and set the mode to "fan only".
actions:
  - device_id: 372e8ca97ff3b05279392bba8f4a2cce
    domain: climate
    entity_id: 54e58335d52e4e856790c87870f1f6e1
    type: set_hvac_mode
    hvac_mode: fan_only
Full automation in yaml below.
alias: "Climate: Fan Only Poor Air Quality"
description: ""
triggers:
  - trigger: state
    entity_id:
      - sensor.study_air_quality
    to: Poor
    for:
      hours: 0
      minutes: 5
      seconds: 0
  - trigger: state
    entity_id:
      - sensor.study_air_quality
    to: Unhealthy
    for:
      hours: 0
      minutes: 5
      seconds: 0
  - trigger: state
    entity_id:
      - binary_sensor.study_occupancy
    to: "on"
    for:
      hours: 0
      minutes: 15
      seconds: 0
conditions:
  - condition: state
    entity_id: binary_sensor.study_occupancy
    state: "on"
  - condition: device
    type: is_off
    device_id: 372e8ca97ff3b05279392bba8f4a2cce
    entity_id: 54e58335d52e4e856790c87870f1f6e1
    domain: switch
  - condition: device
    type: is_on
    device_id: 372e8ca97ff3b05279392bba8f4a2cce
    entity_id: 54e58335d52e4e856790c87870f1f6e1
    domain: switch
  - condition: or
    conditions:
      - condition: state
        entity_id: sensor.study_air_quality
        state: Poor
      - condition: state
        entity_id: sensor.study_air_quality
        state: Unhealthy
actions:
  - device_id: 372e8ca97ff3b05279392bba8f4a2cce
    domain: climate
    entity_id: 54e58335d52e4e856790c87870f1f6e1
    type: set_hvac_mode
    hvac_mode: fan_only
mode: single
Climate: Turn Off Good Air Quality
Finally, we need to turn off the climate system when the air quality returns to "good" levels, or we leave the room.
Again, we give the air quality rating 5 minutes to stabilise, and for occupancy we wait 15 minutes after someone left.
With the conditions, we check a few things:
1. The climate system is on,
2. The zone for the room is on, and
3. The climate mode is fan only
Assuming all the above is true, we switch off the climate system.
Full automation in yaml below.
alias: "Climate: Turn Off Good Air Quality"
description: ""
triggers:
  - trigger: state
    entity_id:
      - sensor.study_air_quality
    to: Good
    for:
      hours: 0
      minutes: 5
      seconds: 0
  - trigger: state
    entity_id:
      - sensor.study_air_quality
    to: Good
    for:
      hours: 0
      minutes: 5
      seconds: 0
  - trigger: state
    entity_id:
      - binary_sensor.study_occupancy
    to: "off"
    for:
      hours: 0
      minutes: 15
      seconds: 0
conditions:
  - condition: device
    type: is_on
    device_id: 372e8ca97ff3b05279392bba8f4a2cce
    entity_id: 54e58335d52e4e856790c87870f1f6e1
    domain: switch
  - condition: device
    type: is_on
    device_id: 372e8ca97ff3b05279392bba8f4a2cce
    entity_id: 54e58335d52e4e856790c87870f1f6e1
    domain: switch
  - condition: device
    device_id: 372e8ca97ff3b05279392bba8f4a2cce
    domain: climate
    entity_id: 54e58335d52e4e856790c87870f1f6e1
    type: is_hvac_mode
    hvac_mode: fan_only
actions:
  - device_id: 372e8ca97ff3b05279392bba8f4a2cce
    domain: climate
    entity_id: 54e58335d52e4e856790c87870f1f6e1
    type: set_hvac_mode
    hvac_mode: "off"
mode: single
And there we have it, a full automated air quality automation.
